In this article, you will learn the meaning of the “Ntfs.sys failed” error, its causes, and how to fix it.
What Is Ntfs.sys?
Ntfs.sys is a critical system file in Windows. It is a driver for the New Technology File System (NTFS), which determines how Windows stores and organizes data on your hard drive. The file is crucial for read and write operations on your hard drive.
What Causes the Ntfs.sys BSOD in Windows?
The error “Ntfs.sys failed” in Windows 11 or 10 is linked to many disk-related problems, such as bad sectors, faulty hard drives, and corrupted file system. The issue could also be caused by problematic drivers, malfunctioning system memory, malware infection, damaged or missing system files, and software conflicts.
You can follow our guide on figuring out the cause of BSODs to find the specific underlying cause of the issue in your system.
How to Fix the “Ntfs.sys Failed” BSOD on Windows 10 and 11
There are different solutions to the error “Ntfs.sys failed” in Windows 10, and one will work for you.
Follow the steps below in their presented order.
Run SFC and DISM scans
The System File Checker (SFC) and Deployment Image Servicing and Management (DISM) tools are built-in Windows utilities designed to find and replace corrupted and missing system files, such as Ntfs.sys.
The following steps will show how to run these tools to resolve the issue:
- Type in
CMDon the search bar of your Windows computer, then right-click on Command Prompt. Then click on Run as administrator. Click Yes if prompted.
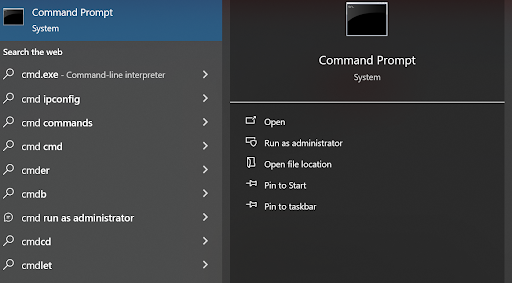
- Start by running the DISM command once Command Prompt opens. Type
DISM /Online /Cleanup-Image /ScanHealthin the window and hit the
Enterkey. - After the DISM operation completes, type in the following command and press
Enterto run the SFC scan:
sfc /scannow - Wait for the scanning process to complete and do not interrupt this process.
- Close the Command Prompt window once SFC reports that it found and replaced faulty system files.
Follow our guide on resolving the “Windows resource protection cannot perform the requested operation” error if you see that message.
Update device drivers
Incompatible device drivers can also trigger the BSOD error. That’s because Windows depends on drivers to communicate with almost every device, including storage controllers and other drivers that interact with your hard drive.
Finding these drivers manually could be a steep challenge, especially if you’re not a technical expert. Hence, you’re better off using a program that can automatically detect and fix malfunctioning or outdated device drivers.
It can also notify you when new updates are released for specific devices.
You can follow our complete guide on updating Windows device drivers to learn more.
Check for disk errors
The CHKDSK tool is a built-in Windows utility that scans your hard drive and system files for errors, lost clusters, and bad sectors and attempts to fix them.
Follow these steps:
- Click the Folder icon in the taskbar.
- Go to the left side of the File Explorer window, right-click This PC, and select Properties.
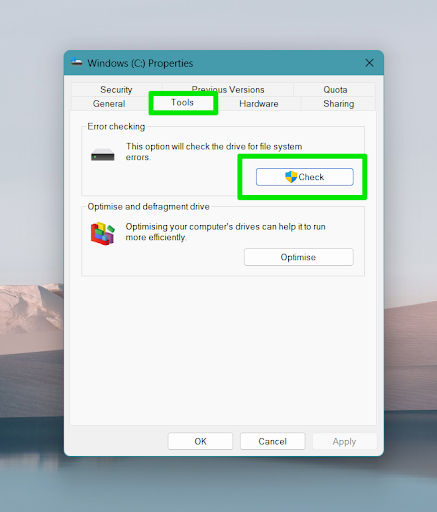
- Head to the Tools tab after the Properties window opens.
- Click on the Check option under the Error checking section, then click Start to run the check.
Further reading: Ultimate Guide: How to Check For and Fix Disk Errors with CHKDSK Command
Scan for malware
Malware can corrupt system files, interfere with critical processes, or damage the hard drive, all of which can lead to BSOD errors.
You can run a malware scan with your antivirus software to fix it. In the absence of third-party antivirus software, the built-in Windows antivirus program also works.
Here’s how to use the Windows Security tool:
- Click the Start icon and type Virus into the search bar. You should see Virus & threat protection as the best match.
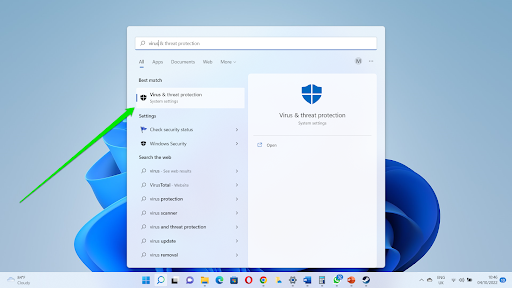
- Click Virus & threat protection and select Scan options.
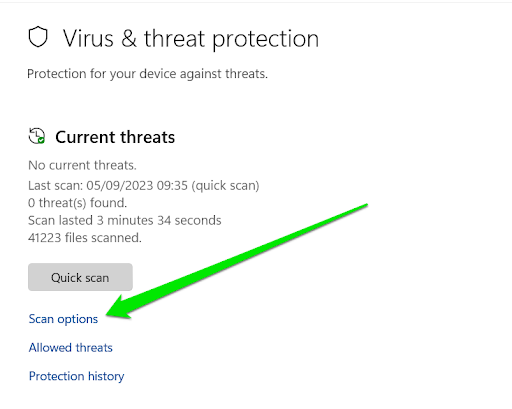
- Select Full scan on the next page and click the Scan now button.
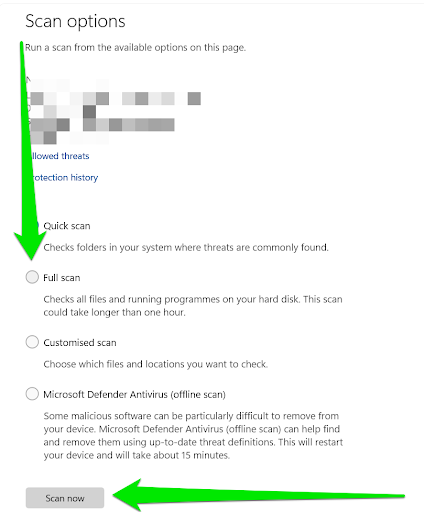
- The antivirus program will now check your entire system for malware that may be causing the BSOD issue.
- You can also run Microsoft Defender Antivirus (offline scan) to go even deeper. This time, the program will turn off your computer and take some critical programs offline to run the scan.
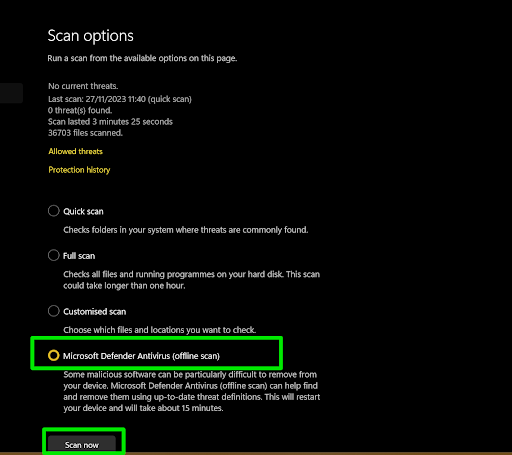
You can follow our malware removal guide to learn more about getting rid of viruses and malicious applications.
Restore Windows
A system restore once rescued me from a serious BSOD challenge. I had installed a problematic driver, and restoring the computer got rid of it.
If the Ntfs.sys blue screen started appearing after you installed an application or update, you can restore Windows to fix the problem. The System Restore utility reverts all the changes you made to your computer up to a specific date, undoing the settings and configurations that may be causing the error.
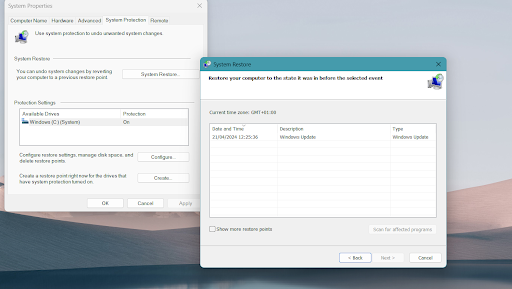
You can follow our system restore guide to resolve the issue.
Check for RAM issues
System memory problems, such as faulty or incorrectly set up RAM modules and memory leaks, can cause the “Ntfs.sys failed” BSOD error. You can manually check that by uninstalling each RAM module and reinstalling them one after the other to determine the faulty one.
Windows 10/11 (8, 7, Vista, XP)
You can also follow our guide on fixing memory leaks to troubleshoot the error.
Reset Windows to factory settings
Resetting your computer should be your last option if nothing else has worked so far. Please ensure to back up your system before attempting this process. While you can prompt Windows to keep your files, it’s always better to be cautious.
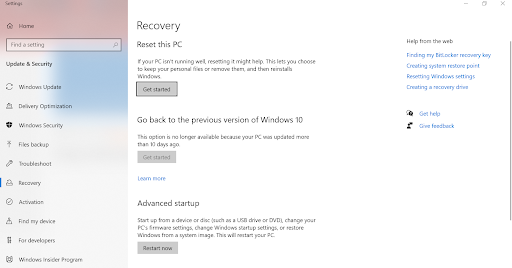
Our guide on factory resetting Windows 10 and 11 will show you everything you need to know.
Ntfs.sys Failed: Fixed
Following the fixes outlined in this post should help you tackle the Ntfs.sys BSOD error on Windows 10 or 11. Remember, systematically trying each fix and restarting your computer after each step is important in figuring out the root cause.
If these solutions don’t resolve the issue, consider seeking assistance from a computer technician or contacting Microsoft support for further guidance.
Head to the comments section to tell us which solution helped you resolve the problem.


