
![[SOLVED] “This Device Doesn’t Support Receiving Miracast”](https://www.auslogics.com/en/articles/wp-content/uploads/2023/03/SOLVEDThis-Device-Doesnt-Support-Receiving-Miracast.png)
- How Does Miracast Work?
- Devices That Support Miracast
- Causes of the “This Device Doesn’t Support Receiving Miracast” Error
- How to Resolve the “Your PC or Mobile Device Doesn’t Support Miracast” Error
- Solution 1: Check if your computer supports Miracast
- Solution 2: Update or reinstall the wireless network adapter driver
- Solution 3: Make sure that Wi-Fi Is enabled on both devices
- Solution 4: Verify that the device has wireless display functionality
- Solution 5: Tweak wireless mode parameters
- Solution 6: Disable third-party VPN solutions
- Extra Tips
- This Device Doesn’t Support Miracast: Solved
- FAQ
In this article, we’ll show you how Miracast works, explore the causes of the error, and find ways to fix this problem on Windows 10.
P.S. You can watch this short video with a quick fix here if you don’t want to read the full article:
How Does Miracast Work?
Miracast relies on Wi-Fi Direct wireless network connections to stream video from your device to an external display. It can stream video in up to 1080p Full HD resolution with 5.1 surround sound.
That said, if you want to use Miracast, your device must be able to establish a direct wireless connection to the external display. Miracast can function independently of your home wireless network.
Miracast connections are very secure. That’s because your device establishes a wireless network that uses the Wi-Fi Protected Setup (WPS) wireless networking standard and is encrypted with WPA2.
You can use Miracast to broadcast video or audio from your smartphone to an external display. You can also display DVDs, CDs, DRM-protected files, and any other media files.
Devices That Support Miracast
After its introduction in 2012, Miracast has gained a huge following, including tech companies. Numerous devices support Miracast, and more are being certified daily.
All big tech players support Miracast on their software and devices. Windows 10 and 11 support it, as well as most Android smartphones and tablets, thanks to manufacturers’ customized implementations of the standard, like Huawei’s Cast and Samsung’s SmartView.
Various manufacturers offer a wide variety of smart TVs, and many of them support Miracast. However, even if your TV doesn’t support Miracast, you can still buy a Miracast adapter.
Causes of the “This Device Doesn’t Support Receiving Miracast” Error
Below are some of the causes of the “This device doesn’t support receiving Miracast” error:
The device doesn’t support Miracast
You may face the ‘“This device doesn’t support receiving Miracast” error because your device actually doesn’t support Miracast. So, your first step should be to check if it does.
Outdated graphics or network drivers
If your computer’s graphics card or network drivers are outdated, you may receive the “This device doesn’t support Miracast” error message. Updating them is the next recommended step to fix the problem.
Disabled Wi-Fi
For Miracast to function, you must turn your Wi-Fi on. So, if you suspect that your PC or mobile device doesn’t support Miracast, it could simply be a matter of Wi-Fi being disabled on one of the devices.
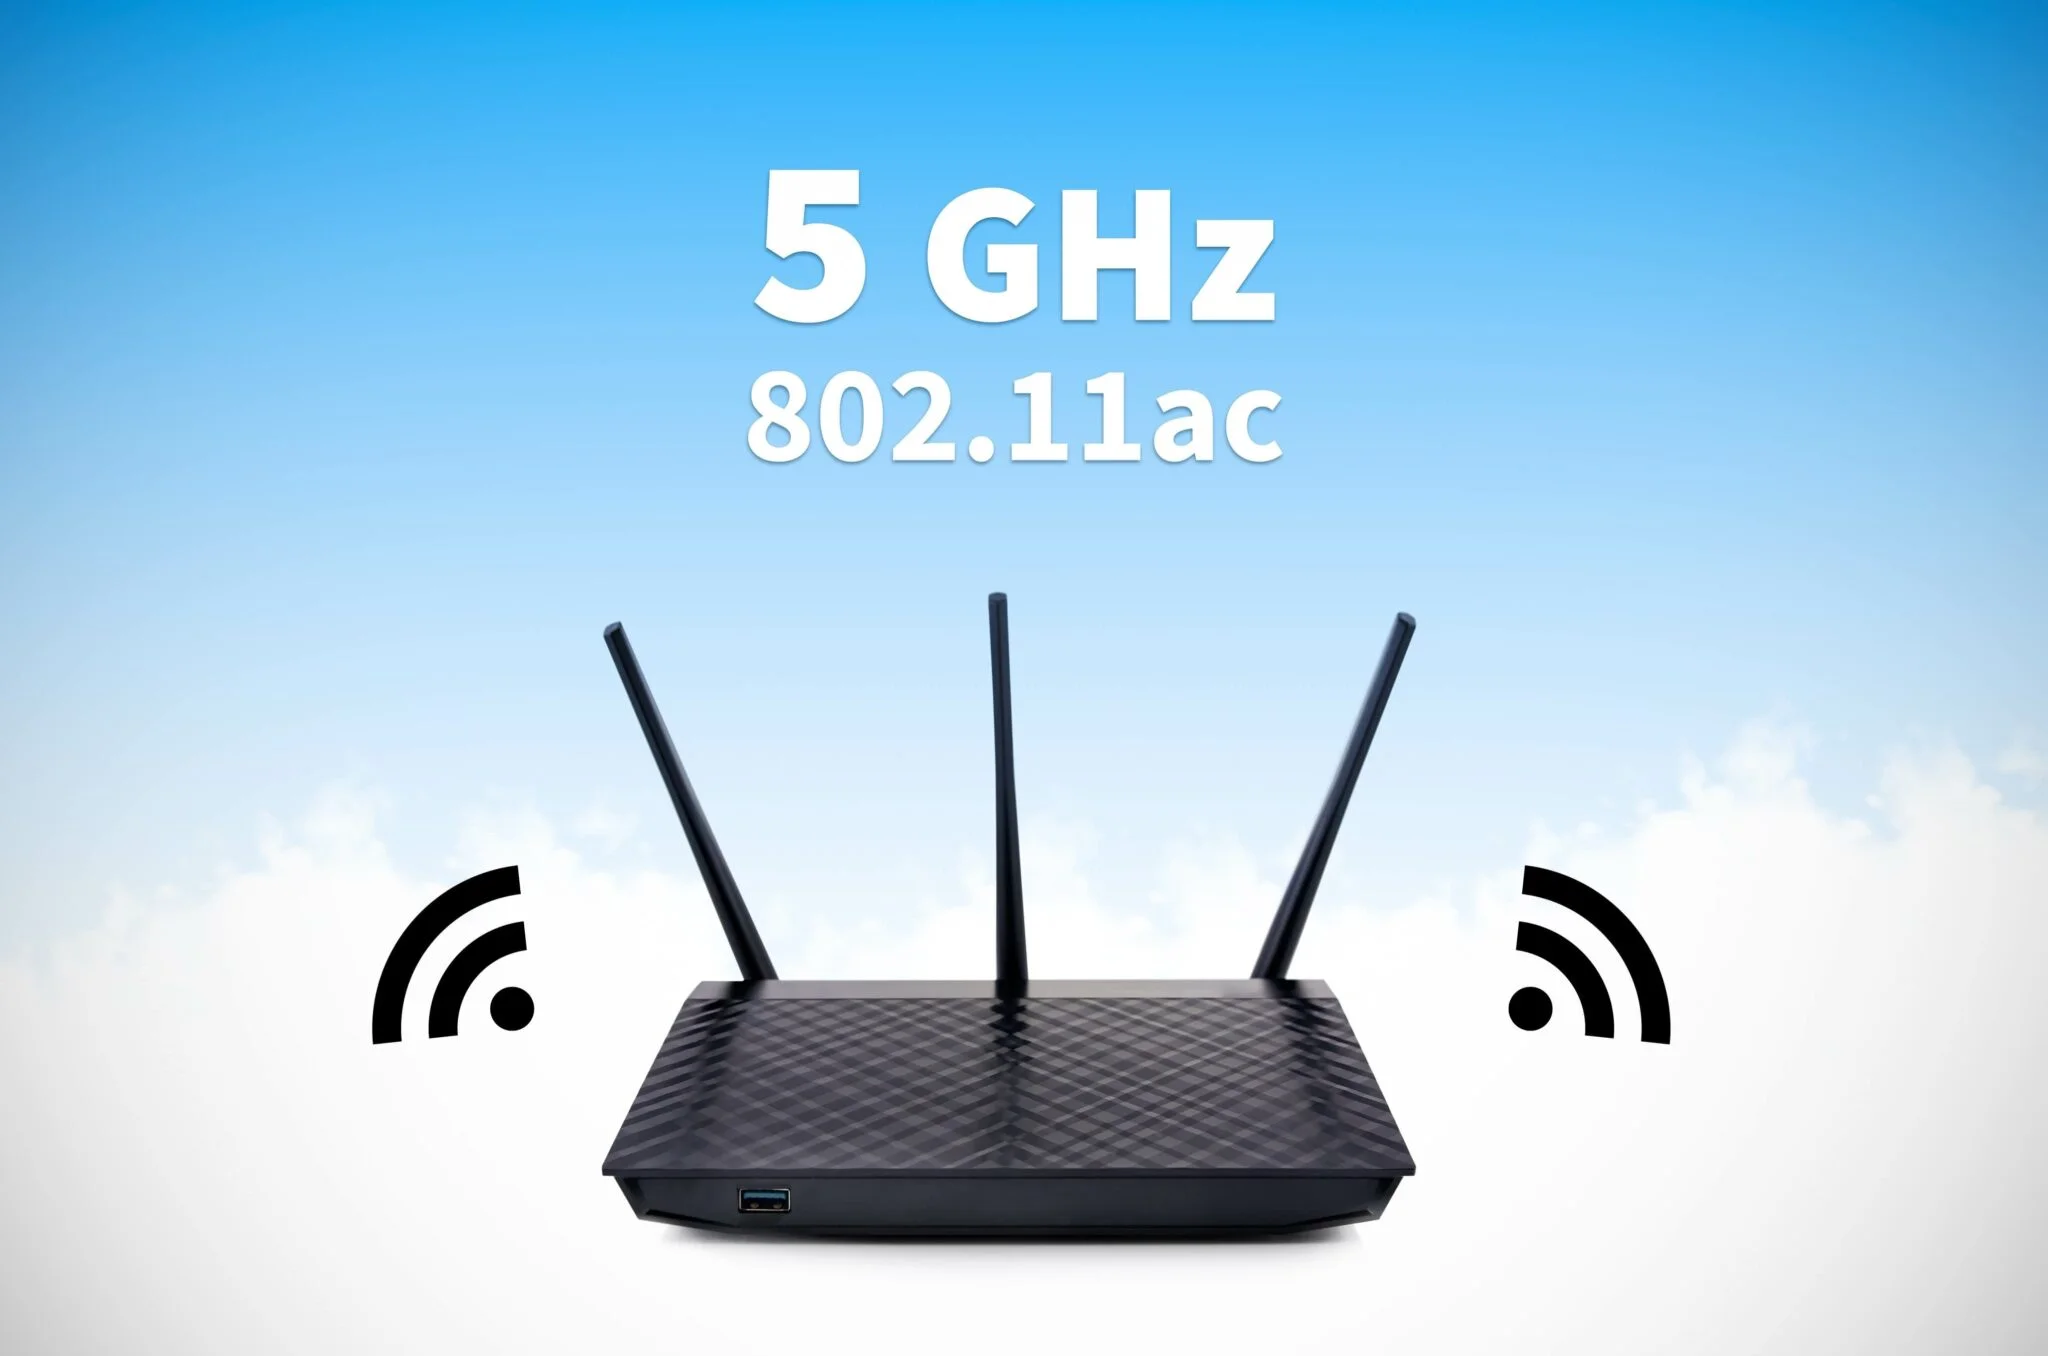
The wireless adapter is forced to 5 GHz
Your wireless adapter may have been changed to the 5 GHz mode, which is why you’re facing this Miracast error. You might resolve the issue by changing the wireless adapter settings.
Screen resolution
It may also be that Miracast won’t work because the screen resolution you’re using is too low. So, you’ll have to change the resolution to fix the error.
How to Resolve the “Your PC or Mobile Device Doesn’t Support Miracast” Error
If you’ve been experiencing the error message “Your PC or mobile device doesn’t support Miracast, so you can’t project to it wirelessly,” below is a list of proven methods to fix it.
Go through all of them to find the one that works for you.
Solution 1: Check if your computer supports Miracast
The first thing you have to do before using Miracast is check if your device supports it.
The Miracast connection is powered by two components, namely your graphics card and network adapter. Check if your network adapter and graphics drivers can support the connection.
Follow these steps to do so:
- To test the graphics driver, open the Run dialog by pressing
Windows logo key + Ron your keyboard. - Type
dxdiagin the text box and click “OK” or press Enter on your keyboard. - On the DirectX window, click on the button that says “Save All Information.”
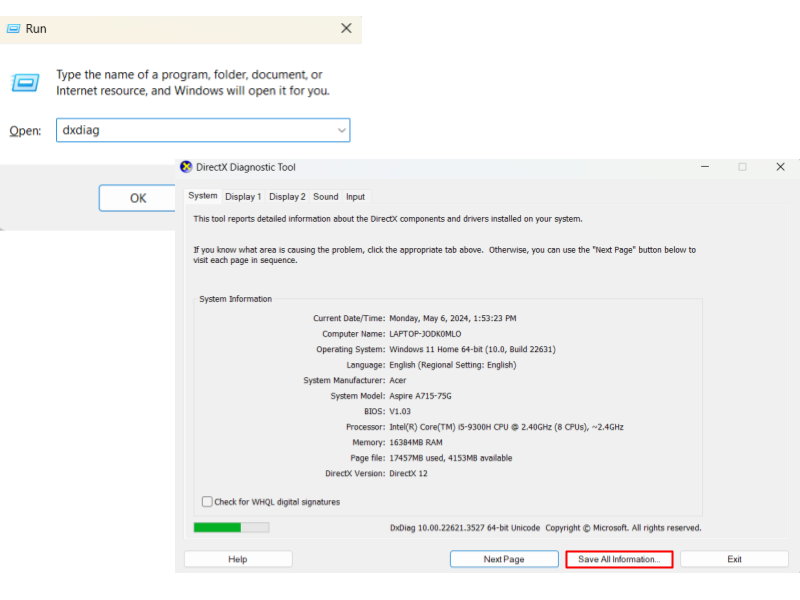
- Select a folder to save the text file. Click “OK.”
- Press
Windows key + Q. - Search for “Notepad” in Cortana.
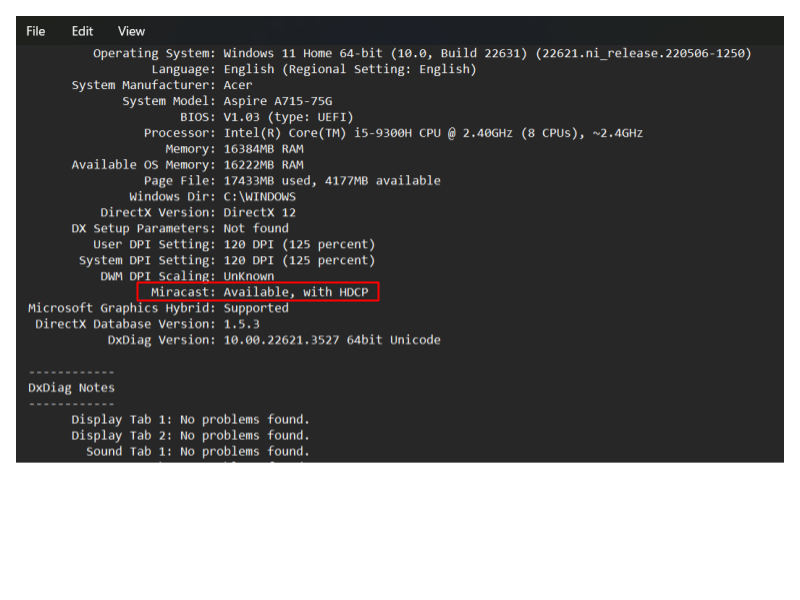
- In Notepad, click on “File” > “Open.”
Open “DxDiag.txt” to see your system information. If you see the “Available, with HDCP” message next to “Miracast” under “System Information,” the connection is supported on your device.
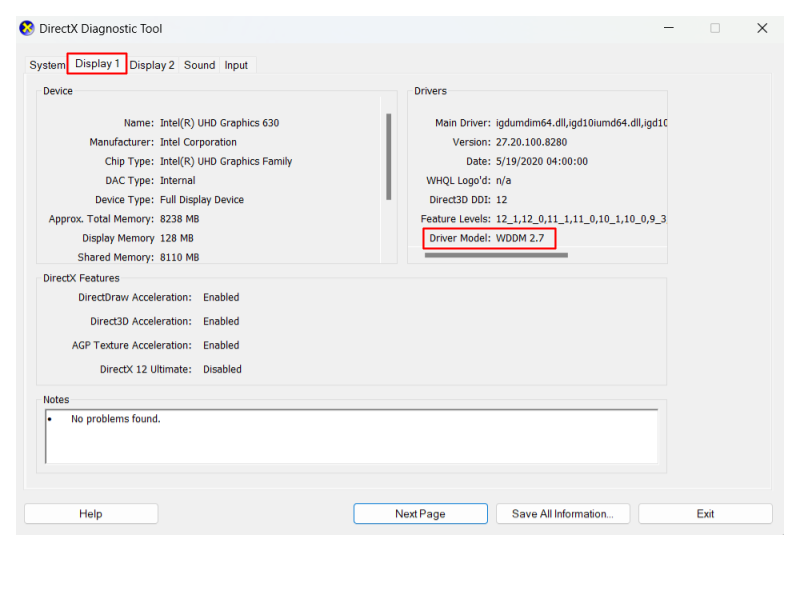
Alternatively, on the DirectX Diagnostic Tool window, click on the “Display” tab and check your graphics driver model. You’ll find it at the bottom of the Drivers column. If the “Driver Model” value is equal to or above “WDDM 1.3,” it means your system supports Miracast.
After you’ve seen that your graphics driver can support Miracast, the next thing to do is check the compatibility of your network adapter. Here’s how:
- Hit
Windows key + Xon your keyboard and select “Windows PowerShell (Admin).” - Copy the following command in the PowerShell window and press Enter:
Get-netadapter|select Name, ndisversion
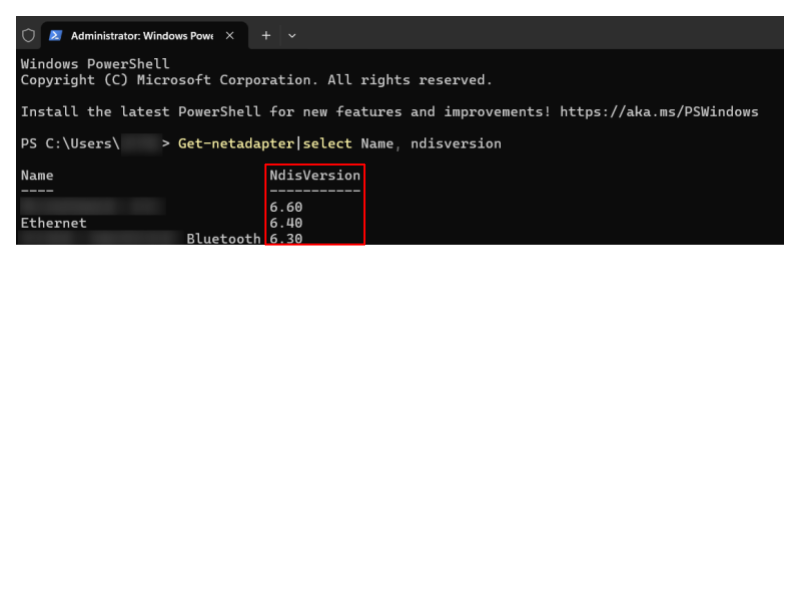
For your PC to support Miracast, the NdisVersion should be above 6.30. If it is under that value, you should try updating your wireless network adapter’s driver.
Also read: Most Useful Powershell Commands: Cheat Sheet with Examples
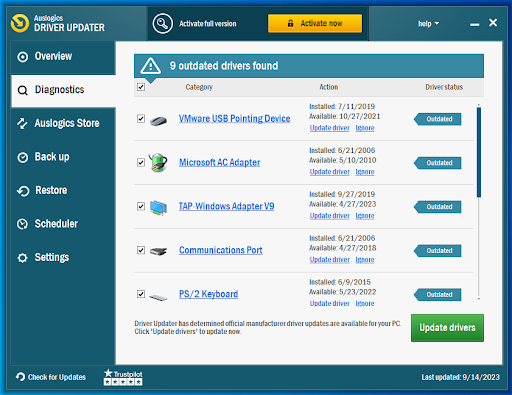
Solution 2: Update or reinstall the wireless network adapter driver
Updating or reinstalling the wireless network adapter driver has proved effective for many users. Follow these steps to update it manually:
- Open the Run dialog by pressing
Windows logokey+ Ron your keyboard. - Type
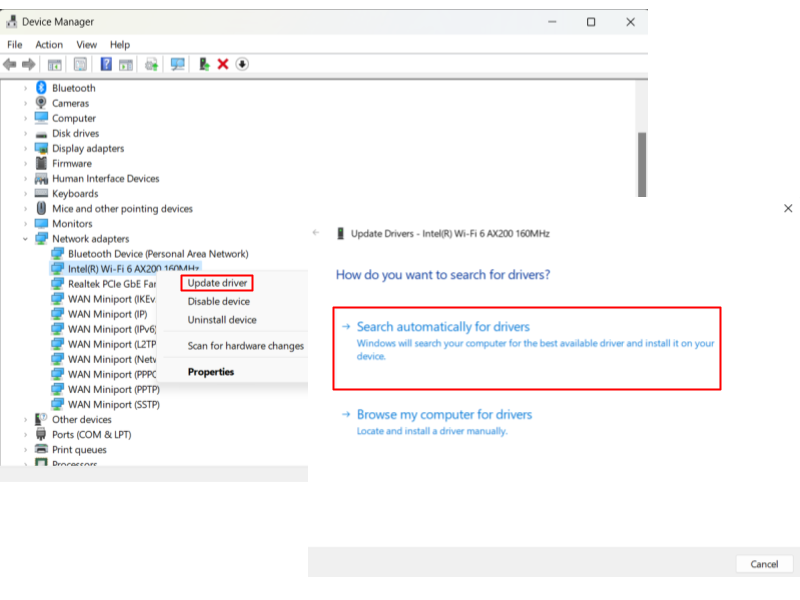
devmgmt.mscin the text box and click “OK” to open Device Manager. - Expand “Network adapters.”
- Right-click on your wireless network adapter and select “Update driver.”
- Click “Search automatically for drivers.”
- Update the driver and check if Miracast works now.
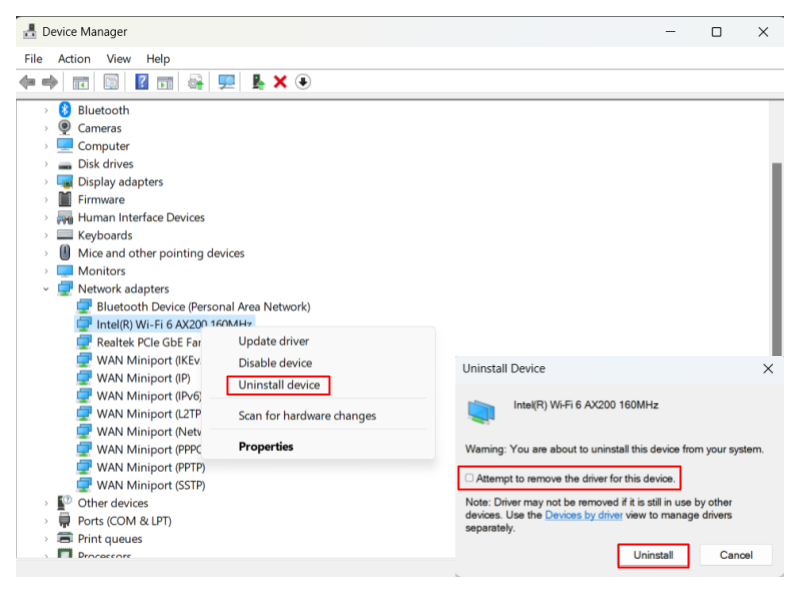
If you still get the “This device doesn’t support Miracast” error message, try reinstalling the driver. Here’s how:
- Repeat steps 1–3 from the previous list.
- Select “Uninstall device” from the menu.
- Check the “Attempt to remove the driver for this device” box and click the “Uninstall” button in the “Uninstall Device” window.
- Restart your computer, and Windows will reinstall the driver automatically.
Related: How to Fix the “Windows Could Not Find a Driver for Your Network Adapter” Error
Solution 3: Make sure that Wi-Fi Is enabled on both devices
If you have confirmed that your devices actually support Miracast but you still get the error message, check if both devices have Wi-Fi enabled.
To check if Wi-Fi is enabled on Windows 10, follow this procedure:
- Press
Windows logo key + Rto open the Run dialog. - Type
ms-settings:network-wifiin the text box. Press Enter or click “OK.” - You’ll be led to the “Wi-Fi” tab of the “Network and Internet” menu in Settings. Click on the toggle to activate Wi-Fi if it is deactivated.

Also, check if Wi-Fi is activated on the other device. How to do so depends on the device in question. On Android and iOS platforms, you can enable Wi-Fi through the Settings app.
Related: Why Does My Internet Keep Going In and Out?
Solution 4: Verify that the device has wireless display functionality
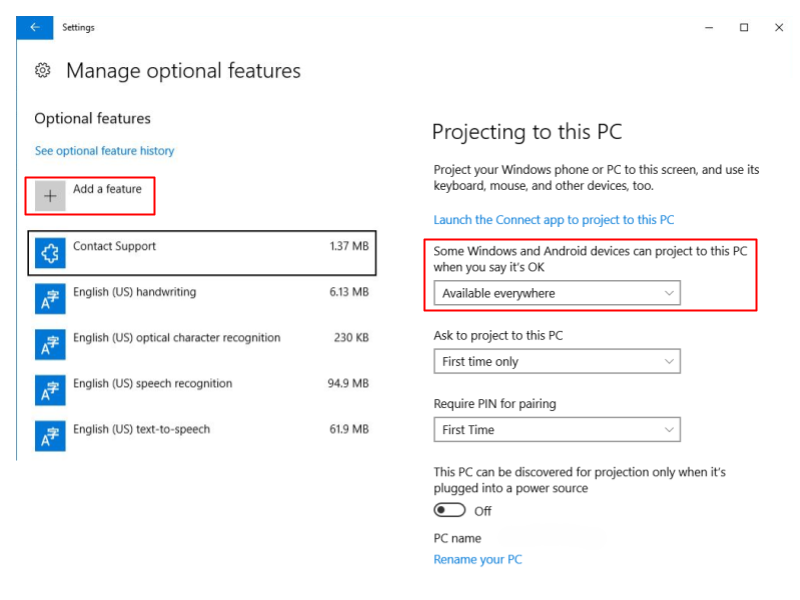
Make sure the wireless display functionality is enabled on the computer you’re trying to project to. Here are the steps to do that:
- First, type “manage optional features” in the search bar and hit Enter.
- Look for “Wireless Display” or click “Add a feature” and add the “Wireless Display” option.
- After that, navigate to Settings and click the “Projecting to this PC” option.
- Select “Available everywhere” from the drop-down menu under “Some Windows and Android devices can project to this PC when you say it’s OK.”
Solution 5: Tweak wireless mode parameters
If your wireless adapter is set to 5GHz or 802.11blg, then you are likely to run into the “Your PC or mobile device doesn’t support Miracast, so it can’t project wirelessly” error.
Setting the wireless mode to “Dual Band 802.11 a/b/g” gives your device the compatibility it needs to work smoothly with Miracast. To apply this setting, follow the steps below:
- Right-click on the Start button. Select “Device Manager.”
- Go to the “Network adapters” drop-down and expand it.
- Right-click on your wireless network adapter and select “Properties.”
- Go to the “Advanced” tab.
- Under the “Property” list, select “802.11 a/b/g Wireless Mode.”
- Click on the “Value” drop-down menu on the right-hand side and select “6. Dual Band 802.11 a/b/g.”
- Click the “OK” button.

Restart your computer to see if the problem with Miracast has been resolved.
Solution 6: Disable third-party VPN solutions
If you have third-party VPN software on your PC, such as Cisco AnyConnect, it will most likely identify Wi-Fi Direct (the Miracast technology) as a split tunnel connection that poses security risks and will not allow establishing a connection.
To fix it, disable any such third-party software and restart your PC.
Extra Tips
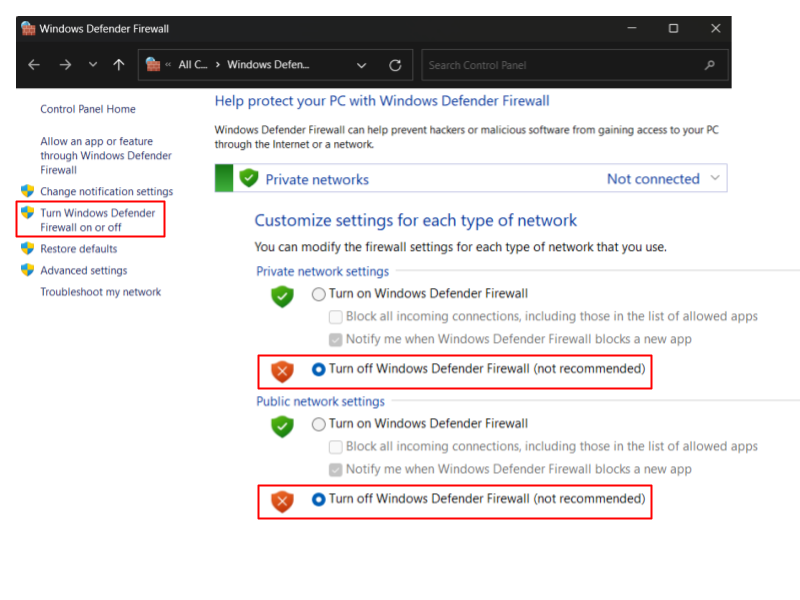
Temporarily disable firewall
If your firewall, for some reason, recognizes your device as suspicious, it may prevent this device from projecting. Disabling your firewall will allow you to check if that’s the case.
Here’s how:
- Click on the search icon in the taskbar, type “Windows Defender Firewall,” and hit Enter.
- Click on “Turn Windows Defender Firewall on or off” in the left-side panel.
- Turn Windows Defender Firewall off for both private and public networks.
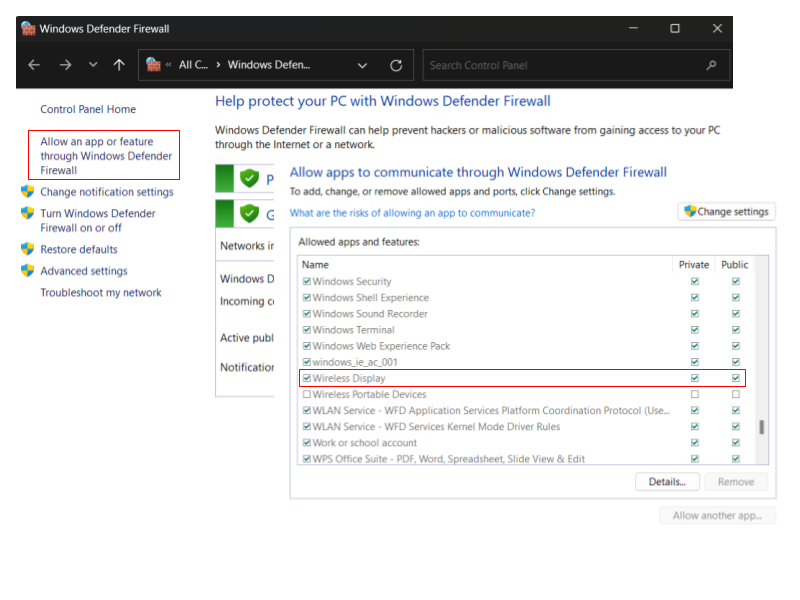
Check if Miracast works now. If it does, you can try to add the “Wireless Display” feature to the list of apps and features allowed by Defender Firewall. Follow these steps:
- Click on the search icon in the taskbar, type “Windows Defender Firewall,” and hit Enter.
- Click on the “Allow an app or feature through Windows Defender Firewall” option in the left-side panel.
- Finally, tick the boxes in both the “Private” and “Public” columns next to “Wireless Display” and click “OK.”
Also read: Does Windows 10 Need Antivirus?
Enable integrated graphics
Most modern computers have integrated graphics. So, if Miracast doesn’t work because of issues with the graphics card, enabling integrated graphics in BIOS will potentially allow you to bypass this problem. The steps for enabling integrated graphics depend on your motherboard. You need to know your PC/laptop model and search online to find out the required steps.
This Device Doesn’t Support Miracast: Solved
In this guide, we’ve covered all aspects of the “This device doesn’t support receiving Miracast” error, including its causes and solutions to resolve it.
If you’ve found this article helpful, share it with your friends and let us know your thoughts or additional tips in the comments below!