In this guide, I’ll walk you through some simple (and not very much so) steps to kick that 0x80070652 error to the curb. But what’s causing this error code to appear in the first place? Here are a few possible culprits:
- Corrupted system files: Missing or corrupted files can mess things up.
- Pending updates: Sometimes, a stuck update can block the next one.
- Software conflicts: Your favorite apps might not play nice with updates.
- Incomplete previous updates: If an earlier update didn’t finish properly, it might cause trouble.
Got it? Great! Let’s move on to the fixes.
How to Fix the Windows Update Error 0x80070652
Method 1: Give your PC a good old restart
Yeah, I know, it sounds too simple, but you’d be surprised how often a restart can fix things. Go ahead, reboot your computer , and try updating again. Sometimes, a fresh start is all it takes.
Method 2: Run the Windows Update troubleshooter
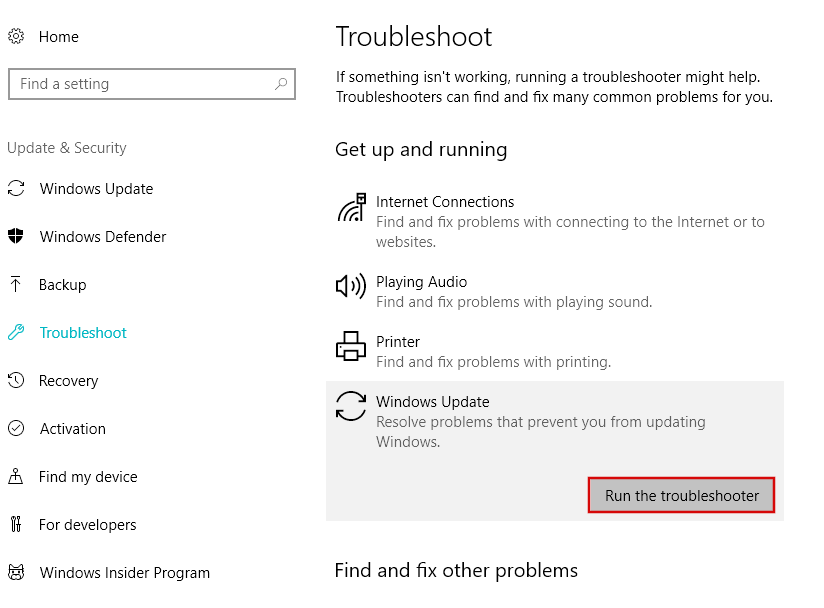
If the restart didn’t do the trick, it’s time for some real troubleshooting. Let’s start with the easy stuff. Windows comes with a built-in troubleshooter that can help you out. Here are the steps for Windows 10:
- Press
Win + I (this keyboard shortcut opens the Settings app).
- Head over to Update & Security > Troubleshoot .
- Click on Windows Update and then Run the troubleshooter .
- Just follow the prompts and let Windows do its thing.
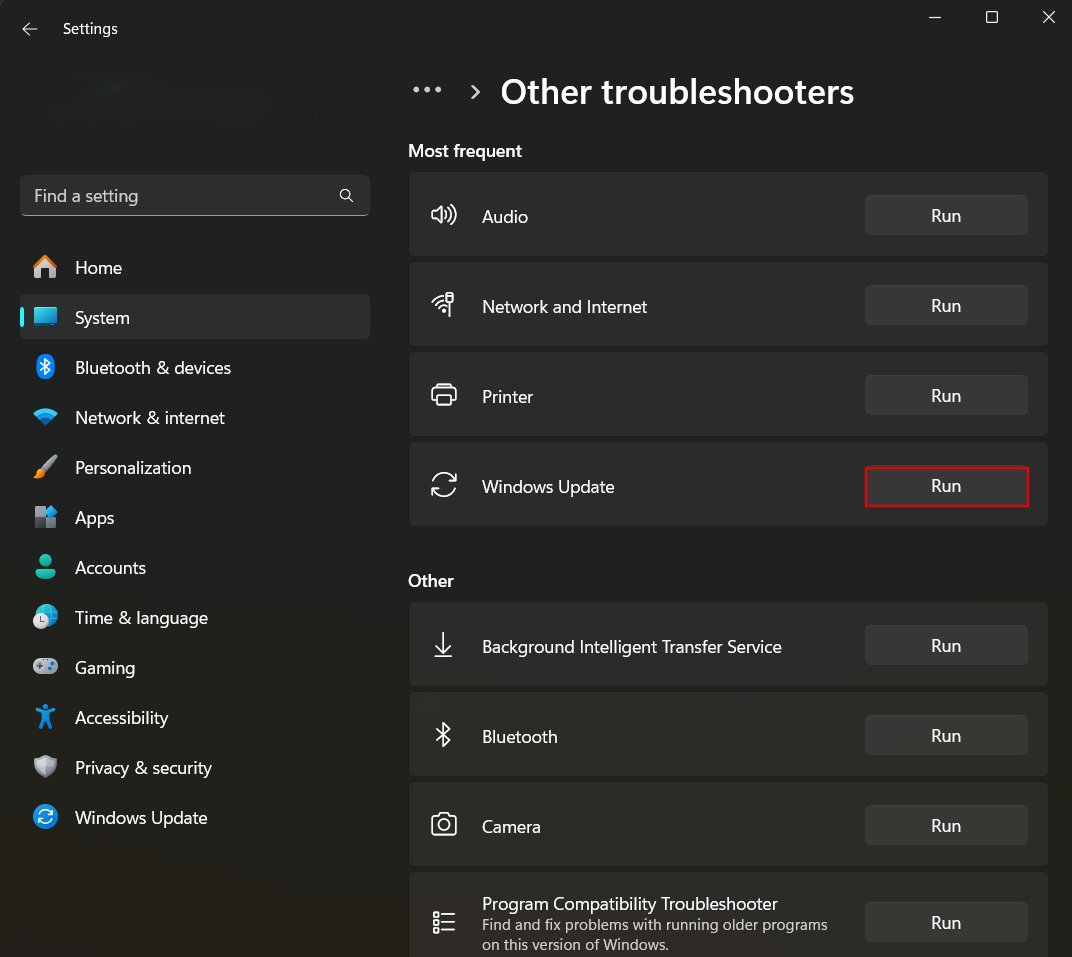
If you’re running Windows 11, follow this:
- Press
Win + I to get to the Settings app.
- Go to System > Troubleshoot .
- Click Other troubleshooters .
- Click Run next to Windows Update.
This tool can be a lifesaver when it comes to knocking out those common update issues like the error code 0x80070652 .
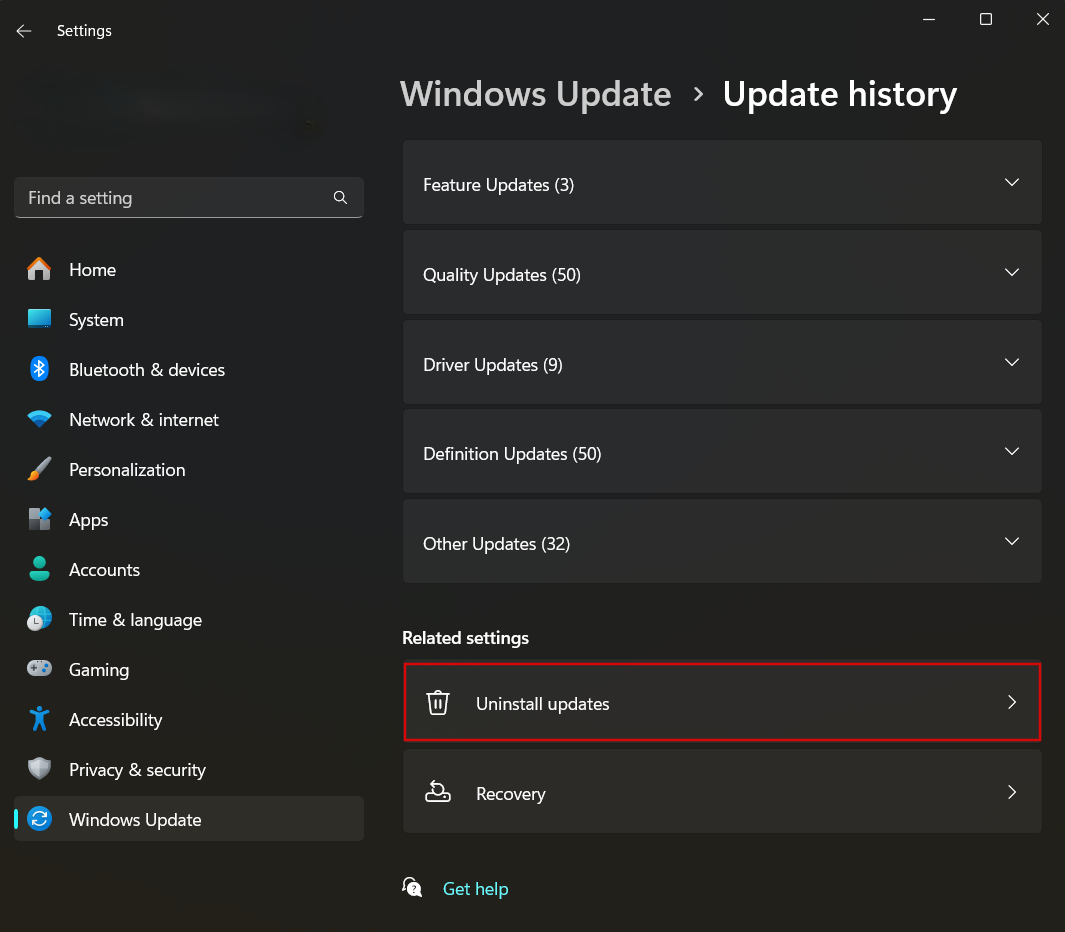
Method 3: Roll back the latest updates
Did the error show up right after a recent update? If so, that update might be the troublemaker. Rolling it back can sometimes clear up issues like the error 0x80070652. Here’s how to uninstall the update manually:
- Go to Settings > Windows Update > Update history if you’re on Windows 11 (or Settings > Update & Security > View update history if you have Windows 10).
- Scroll down and click on Uninstall updates .
- Find the latest update and click Uninstall .
- After that, restart your computer and check for updates again.
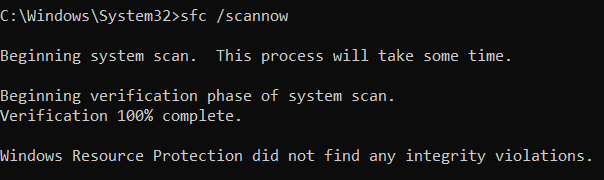
Method 4: Run the System File Checker (SFC)
If corrupted system files are the problem, the SFC tool can help you out.
- Open the Command Prompt as an administrator (type cmd in the search bar, then right-click and choose Run as administrator ).
- Type sfc /scannow and hit
Enter.
- Grab a coffee because this might take a while.
- Once it’s done, restart your computer and try the update again.
The SFC tool is like a digital plumber—fixing leaks in your system that might be causing the error code 0x80070652 to pop up.
Method 5: Update your drivers
If none of the methods above have worked so far, there’s a good chance that you get the 0x80070652 error because of outdated or even missing drivers that are causing conflicts. There are a few ways you can update your drivers:
- By downloading them directly from the manufacturer’s website (if you know the exact driver for your exact PC specification)
- By updating them via Device Manage r (which doesn’t guarantee you install the latest versions)
- By using third-party apps to automate the process
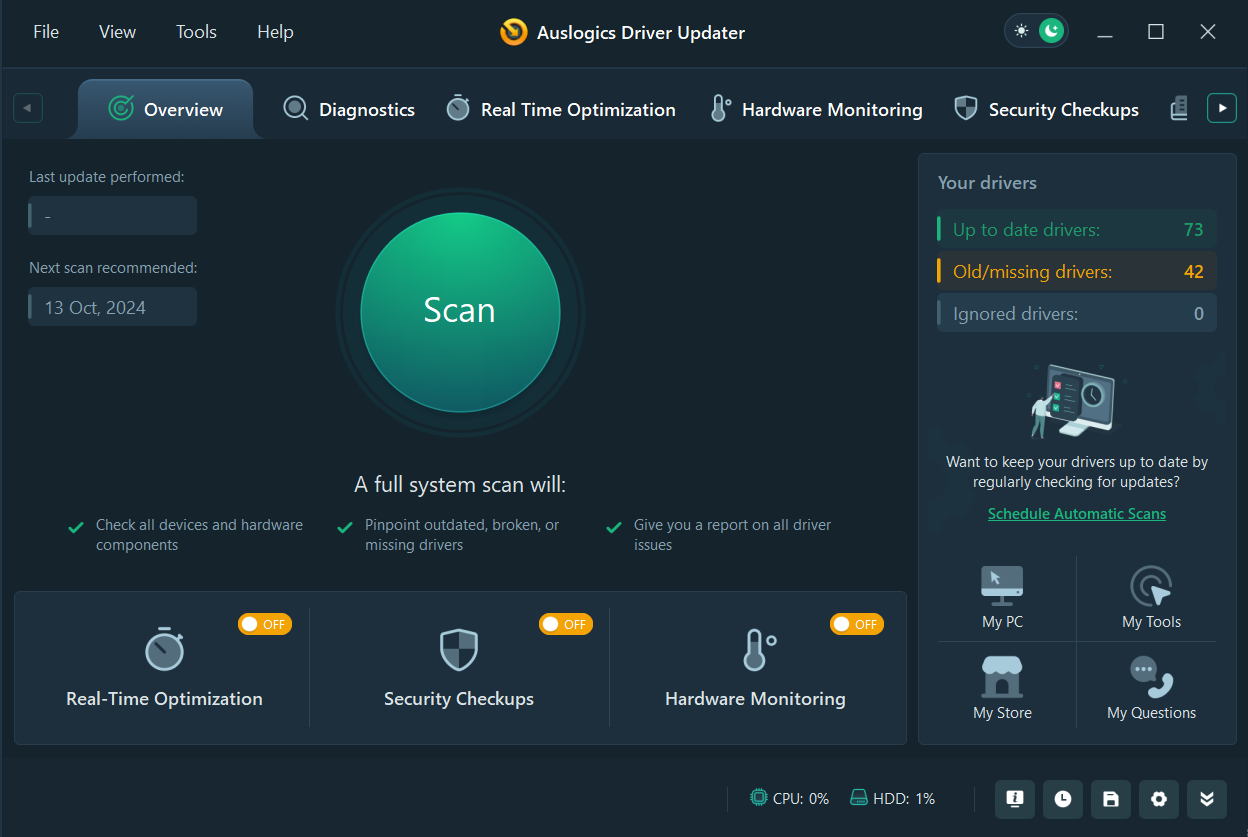
My personal recommendation here is to go with Auslogics Driver Updater —it’s a convenient and reliable tool with a constantly refreshed database to update all your outdated drivers just in one click.
Download Auslogics Driver Updater
Prevent hardware errors and ensure problem-free device operation with this advanced tool that detects outdated drivers and safely gets them updated.
Method 6: Reset Windows Update components
This one’s a bit more involved, but it’s worth a shot if the other methods haven’t worked.
Rename the SoftwareDistribution and Catroot2 folders with these commands:
ren C:\Windows\SoftwareDistribution SoftwareDistribution.old
ren C:\Windows\System32\catroot2 Catroot2.old
Resetting the update components might sound scary, but it can be just what you need to fix the 0x80070652 error.
Method 7: Manually install the update
If Windows Update just won’t cooperate, you can manually install the update.
- Visit the Microsoft Update Catalog .
- Search for the update by its KB number (go to Windows Update > Update history to check it).
- Download the update that matches your system.
- Run the downloaded file to install the update.
Doing it manually can sometimes dodge the issue and get your updates back on track.
Method 8: Run the batch script
If you still get the error code 0x80070652, try running the batch script to reset Windows Update. Here’s how:
- Click Start , search for Notepad , and hit
Enter.
- Copy and paste the following:
@ECHO OFF

echo Simple Script to Reset / Clear Windows Update

echo.

PAUSE

echo.

attrib -h -r -s %windir%\system32\catroot2

attrib -h -r -s %windir%\system32\catroot2\*.*

net stop wuauserv

net stop CryptSvc

net stop BITS

ren %windir%\system32\catroot2 catroot2.old

ren %windir%\SoftwareDistribution SoftwareDistribution.old

ren "%ALLUSERSPROFILE%\Microsoft\Network\Downloader" Downloader.old

net start BITS

net start CryptSvc

net start wuauserv

echo.

echo Task completed successfully …

echo.

PAUSE
- Save the file as WUReset.bat at your preferred location.
- Close Notepad, right-click the batch file you’ve just created, and select Run as administrator .
- Once it’s completed, restart your PC.
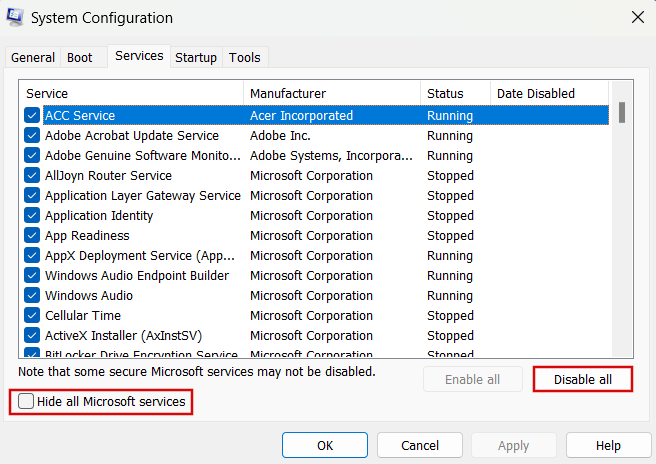
If all else fails, it’s time to strip things back with a clean boot . This starts your computer with just the essentials, so you can see if something else is causing the problem.
- Press
Win + R, type msconfig, and hit Enter.
- In the System Configuration window, go to the Services tab.
- Check Hide all Microsoft services and then click Disable all.
- Go to the Startup tab and click Open Task Manager .
- Disable everything here.
- Close Task Manager, click OK in System Configuration, and restart your computer.
Try running the update again after a clean boot. If it works, you’ll know something else was getting in the way. Start enabling services one by one to expose the one to blame. And here’s a little friendly tip: to complete this quest at least twice as fast, you can first enable half of the services to see if the culprit is in this list. If it is, then enable half of the services in this shortened list, and so on, until you find your culprit.
Download Auslogics Driver Updater
Prevent hardware errors and ensure problem-free device operation with this advanced tool that detects outdated drivers and safely gets them updated.
The Windows Update Error 0x80070652: Fixed
Phew… That’s a wrap! It might take a bit of patience to fix the 0x80070652 error, but one of these methods should do the trick. So, give these fixes a try and say goodbye to the error for good! And let me know which one worked for you in the comments below!
![[FIXED] How to Fix Windows Update Error 0x80070652 on Windows 10/11?](https://www.auslogics.com/en/articles/wp-content/uploads/2018/08/How-to-fix-Windows-10-update-error-0x80070652-1-568x359.webp)